

WIE MAN SMARTERS IPTV EINRICHTET
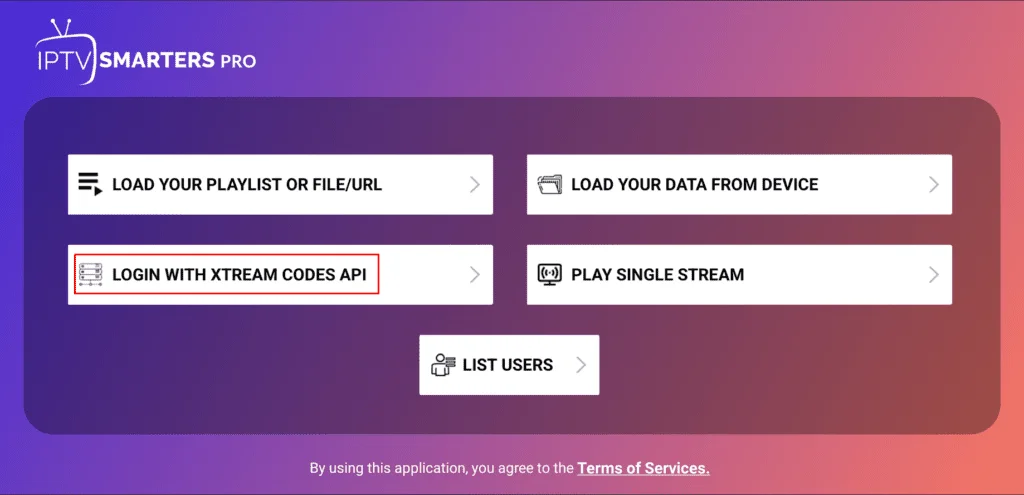
Schritt 1: Sobald die App installiert ist, öffnen Sie die IPTV Smarters Pro-App und klicken Sie auf “Neuen Benutzer hinzufügen”.
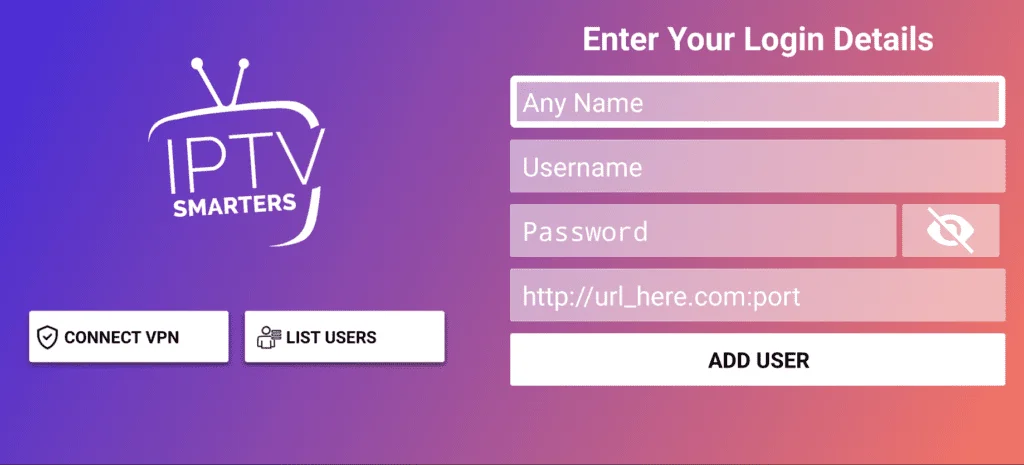
Schritt 2: Jetzt müssen Sie sich in der App anmelden. Es gibt zwei Möglichkeiten, dies zu tun. Entweder indem Sie die M3U-Playlist verwenden oder indem Sie den Benutzernamen und das Passwort verwenden, das die Xtream-Codes-API ist.
Der Benutzername und das Passwort können gefunden werden, indem Sie die E-Mail-Anmeldeinformationen betrachten, die wir Ihnen geschickt haben.
Schritt 3: Sobald Sie sich angemeldet haben, werden Sie zur Benutzerliste weitergeleitet. Klicken Sie auf das Profil, das Sie gerade erstellt haben.
Schritt 4: Herzlichen Glückwunsch, Sie haben die IPTV Smarters Pro App nun erfolgreich eingerichtet und konfiguriert.
SMART TV (Samsung/LG/Android)
FIRESTICK : Wie installiere ich SMARTERS IPTV
1. Zuerst werden wir die App „Downloader“ installieren.
Diese App wird Ihnen dabei helfen, IPTV Smarters auf FireStick zu sideloaden (da Browser-Downloads nicht erlaubt sind).
Sie können auch unseren ausführlichen Leitfaden lesen, wie man Apps auf FireStick mit Downloader sideloadet.
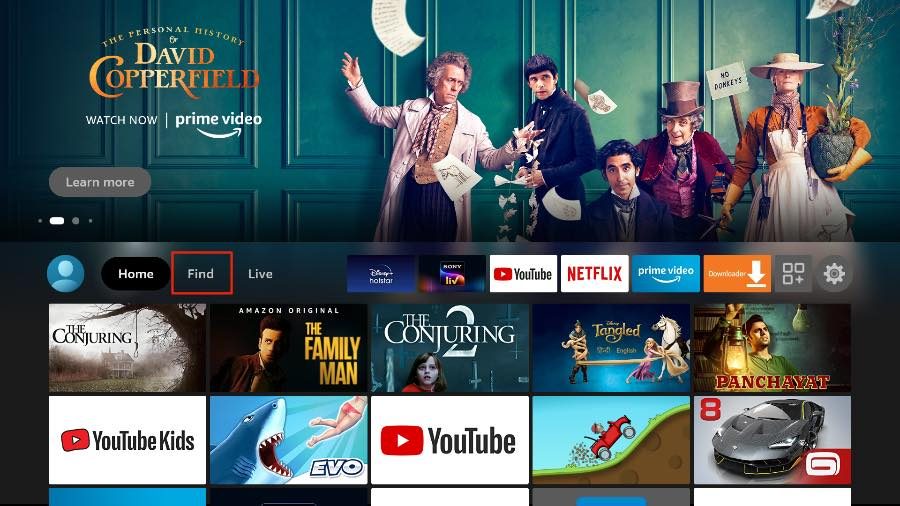
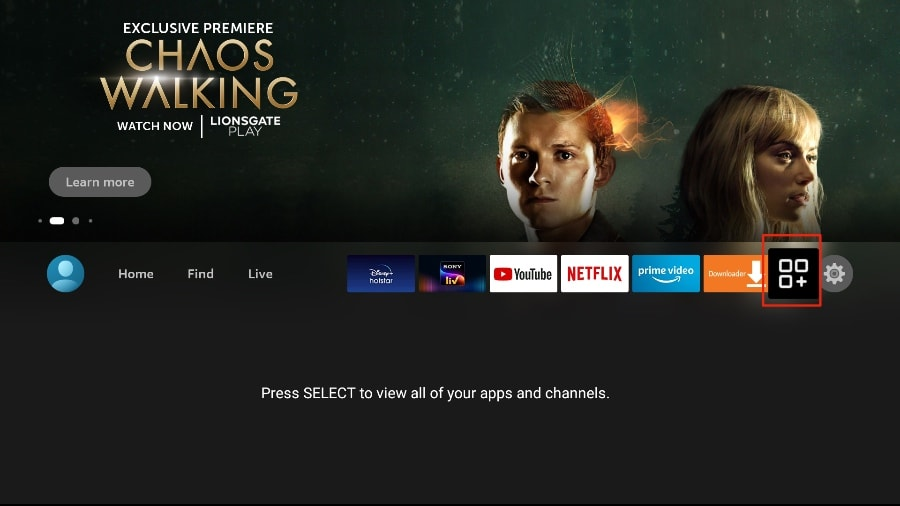
2. Klicken Sie auf die Option „Finden > Suchen“ auf dem Startbildschirm von FireStick.
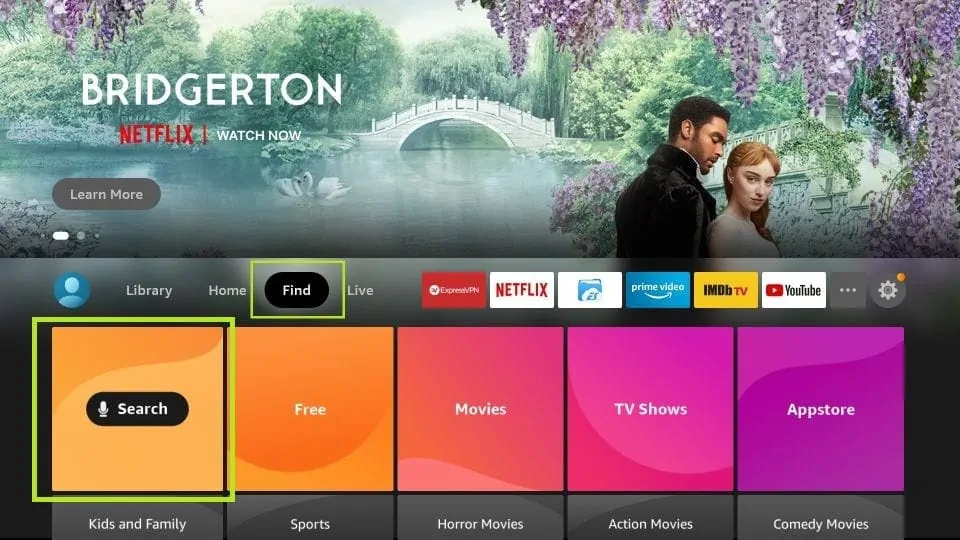
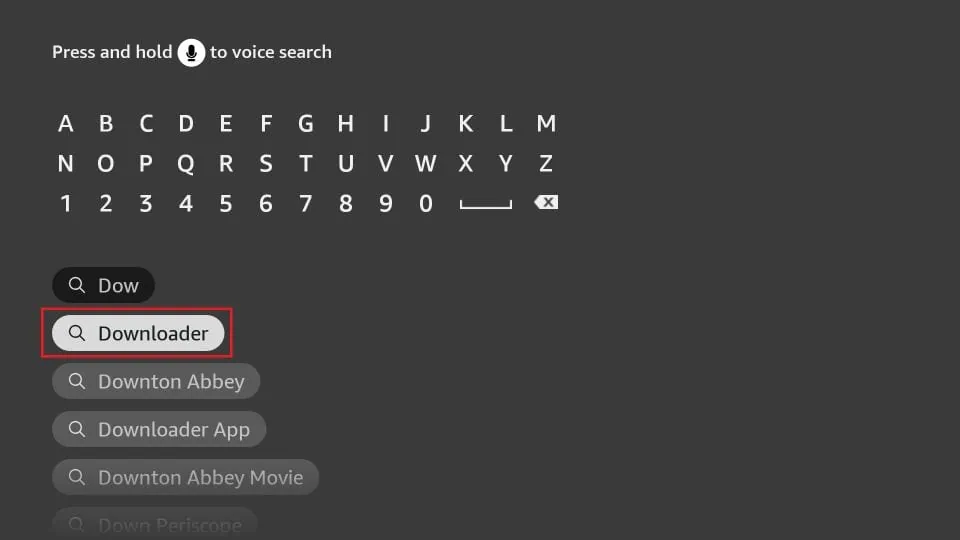
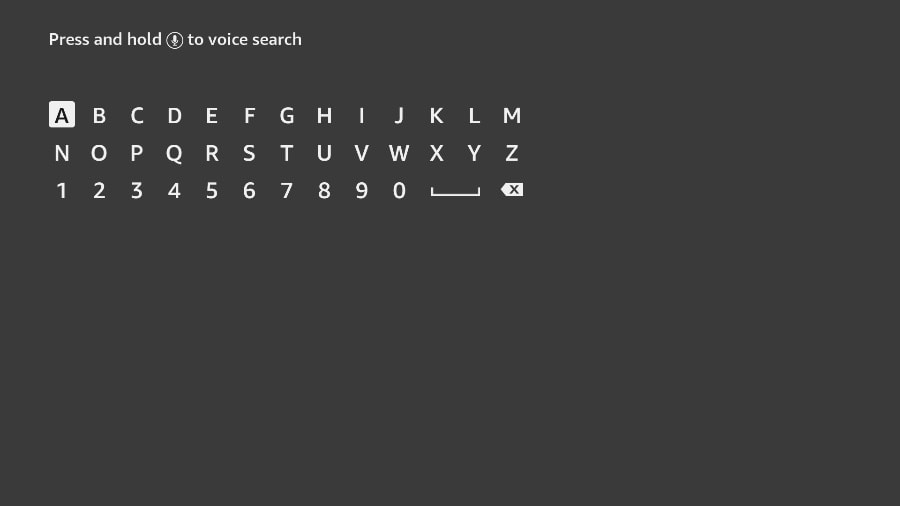
3. Geben Sie den Namen der App ein (die heißt Downloader).
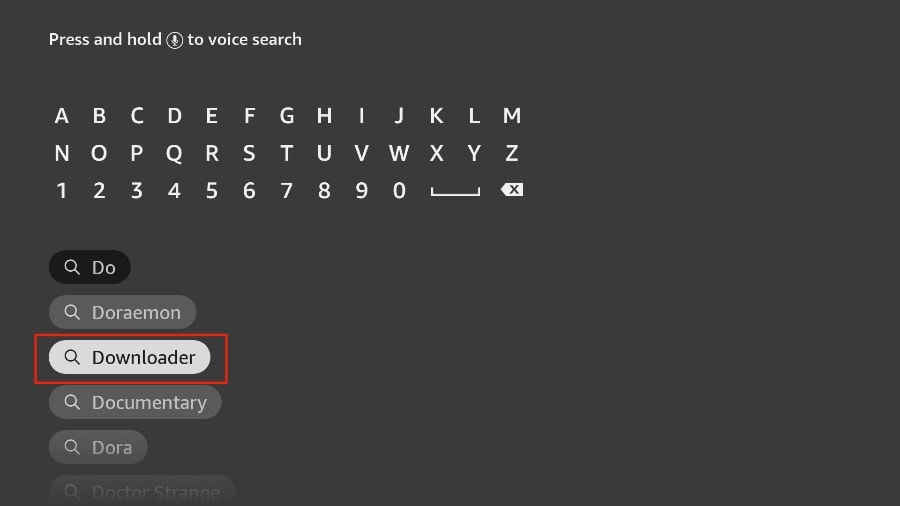
Wählen Sie die Option „Downloader“, wenn sie in den Suchergebnissen angezeigt wird.
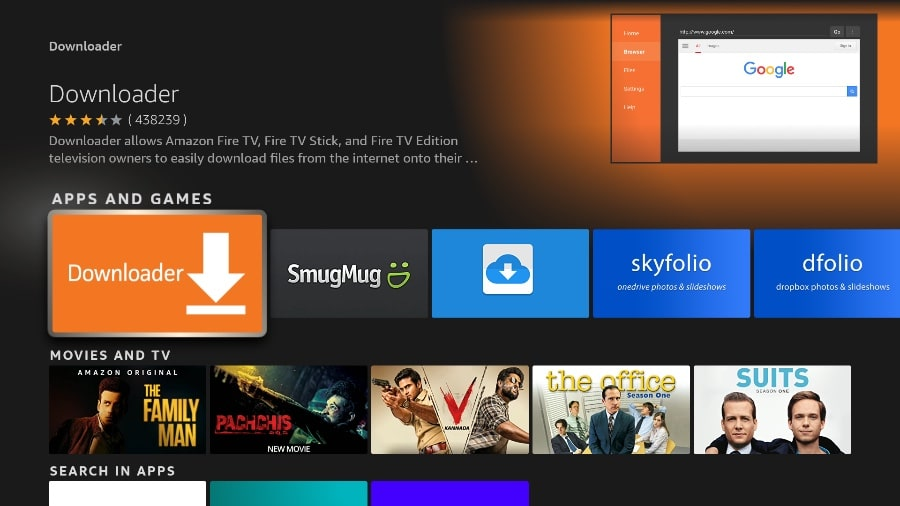
Wählen Sie das Downloader-Symbol auf dem folgenden Bildschirm aus und laden Sie die App herunter und installieren Sie sie.
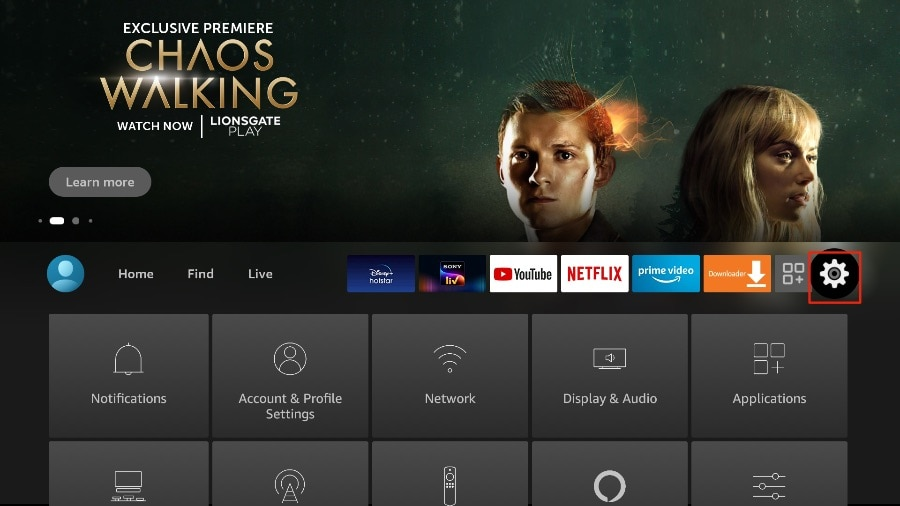
4.Kehren Sie nach der Installation der Downloader-App zum Startbildschirm von FireStick zurück.
In der Menüleiste klicken Sie auf “Einstellungen”.
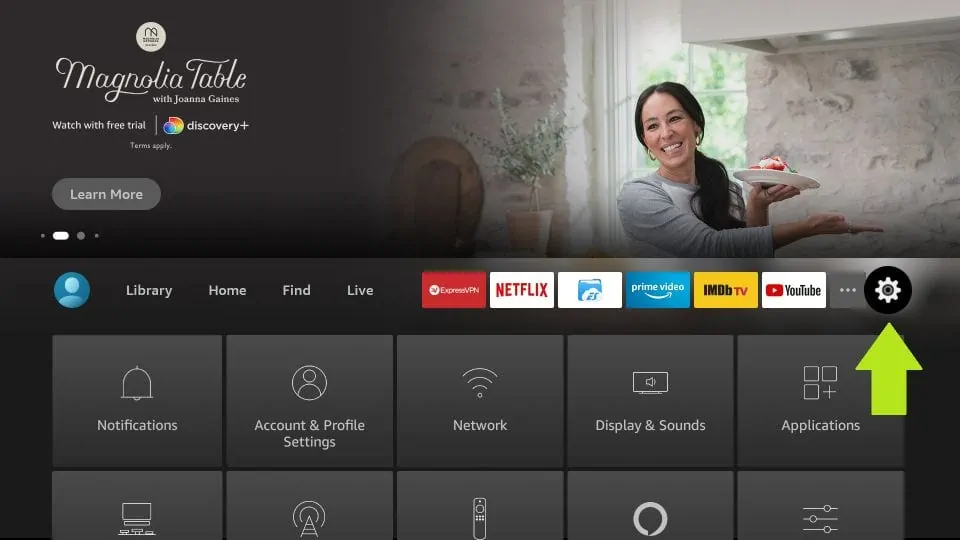
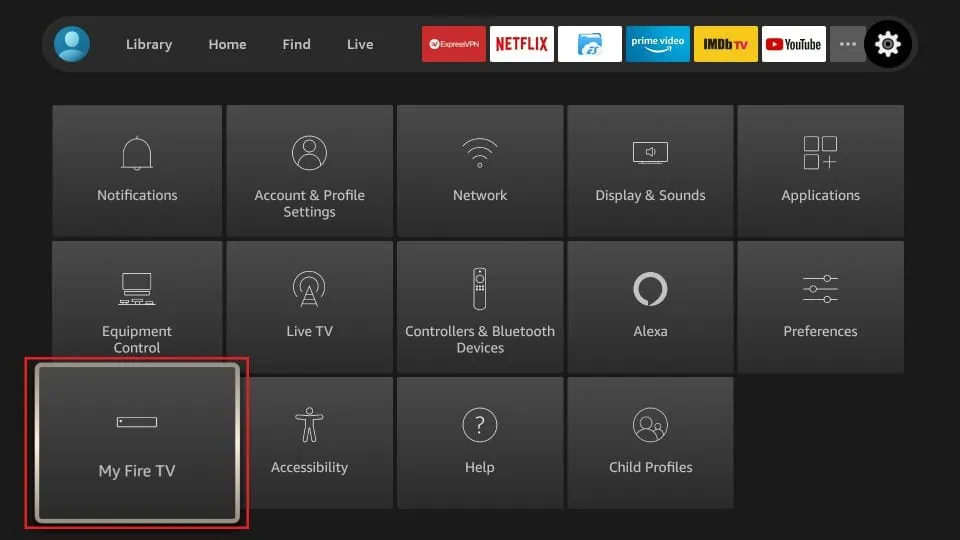
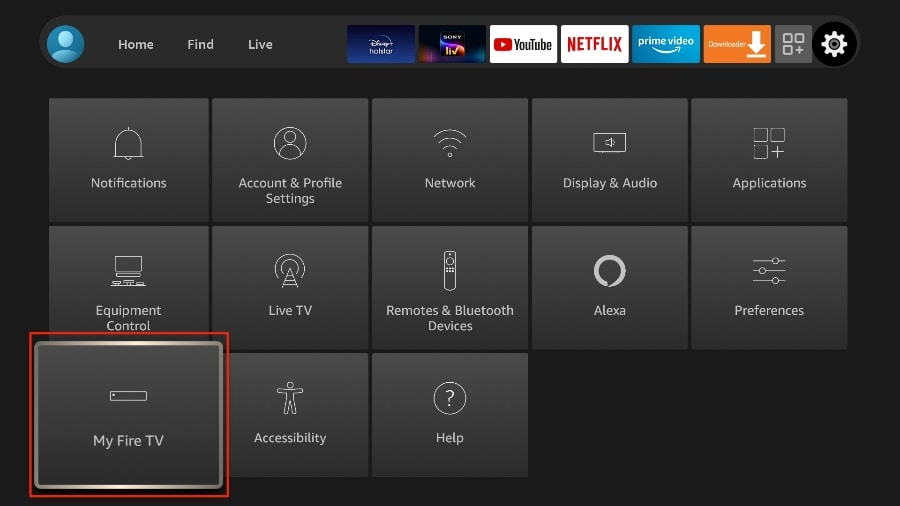
5. In den Einstellungen wählen Sie die Option “Mein Fire TV”.
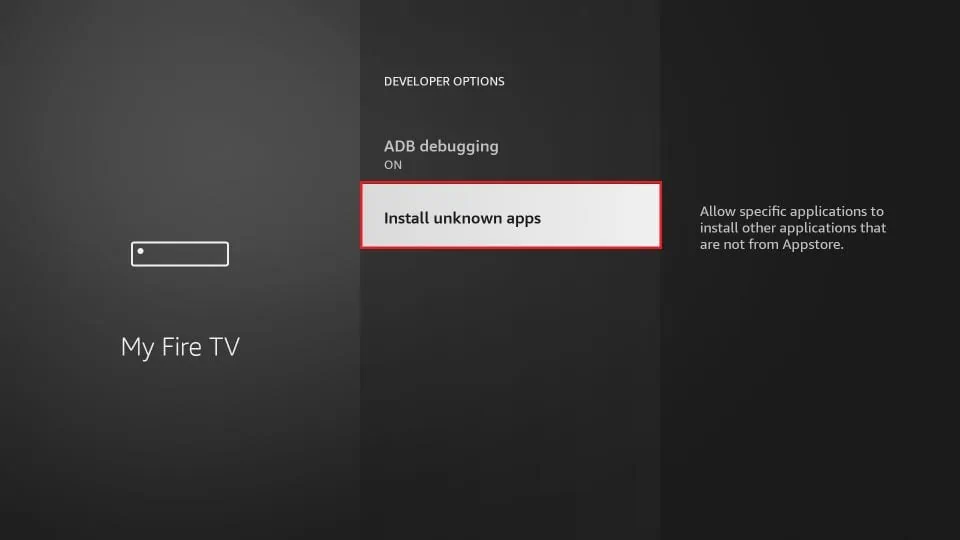
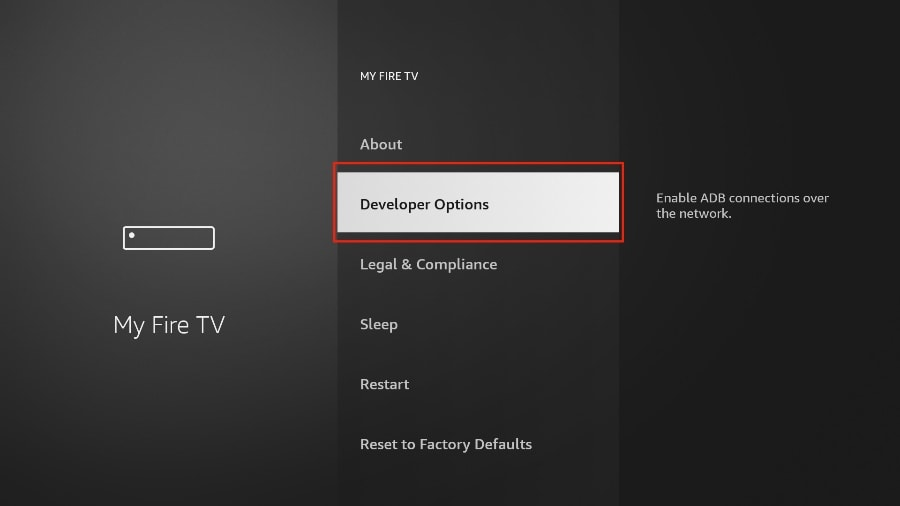
6. Wenn auf dem nächsten Bildschirm die folgende Reihe von Optionen angezeigt wird, klicken Sie auf “Entwickleroptionen“.

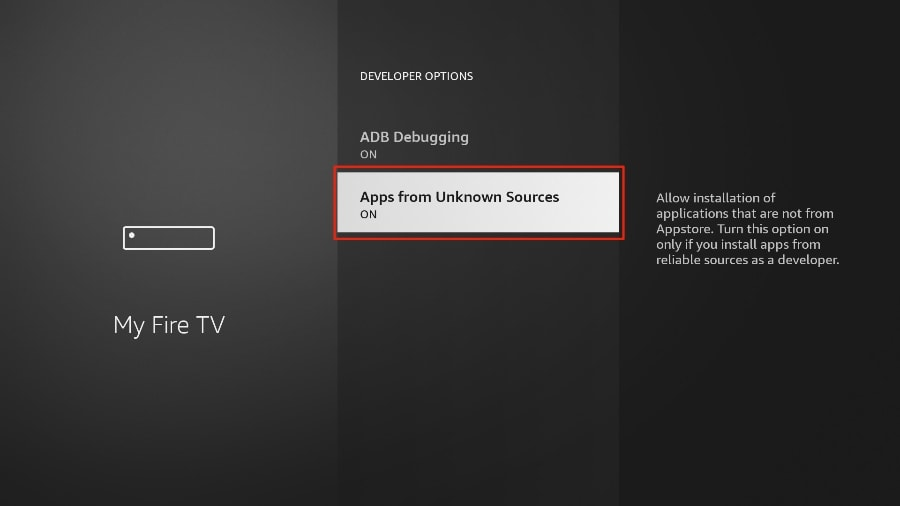
7. Klicken Sie auf “Installation aus unbekannten Quellen“.
8. Klicken Sie auf “Downloader“, um den Status auf “EIN” zu ändern.
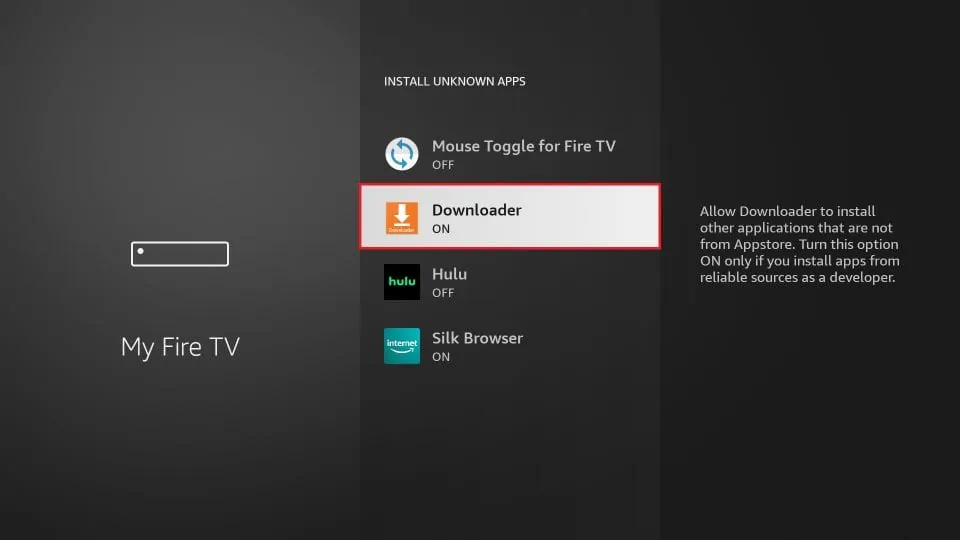
Damit haben Sie die FireStick-Einstellungen konfiguriert, um die Installation von IPTV Smarters und anderen Apps von Drittanbietern zu ermöglichen. Folgen Sie den untenstehenden Schritten:
9. Sie können nun die Downloader-App öffnen.
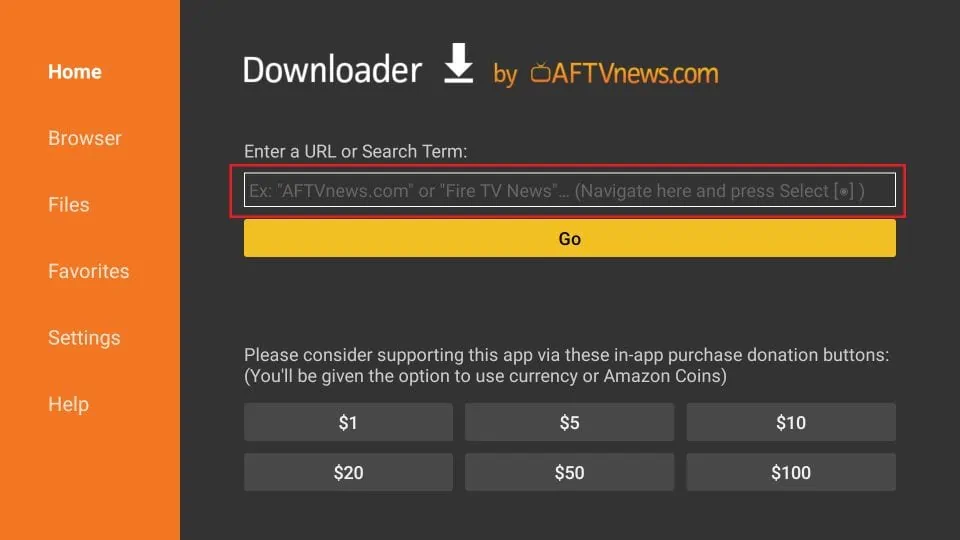
Wenn Sie diese App zum ersten Mal ausführen, erscheint eine Reihe von Hinweisen. Ignorieren Sie diese, bis Sie den folgenden Bildschirm sehen.
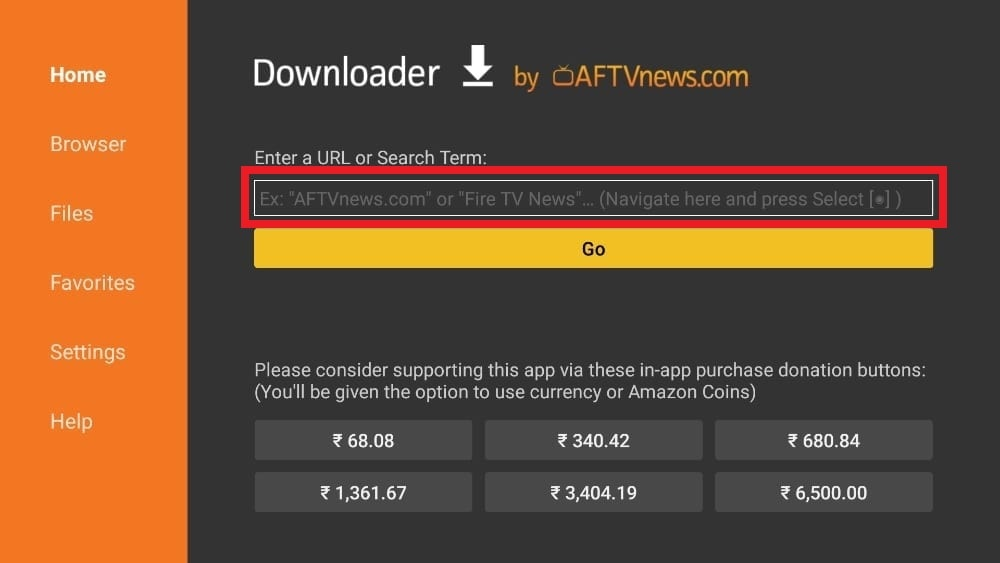
Auf diesem Bildschirm müssen Sie auf das URL-Textfeld auf der rechten Seite klicken (stellen Sie sicher, dass die Option “Startseite” im linken Menü ausgewählt ist), wo steht ‘http://’.
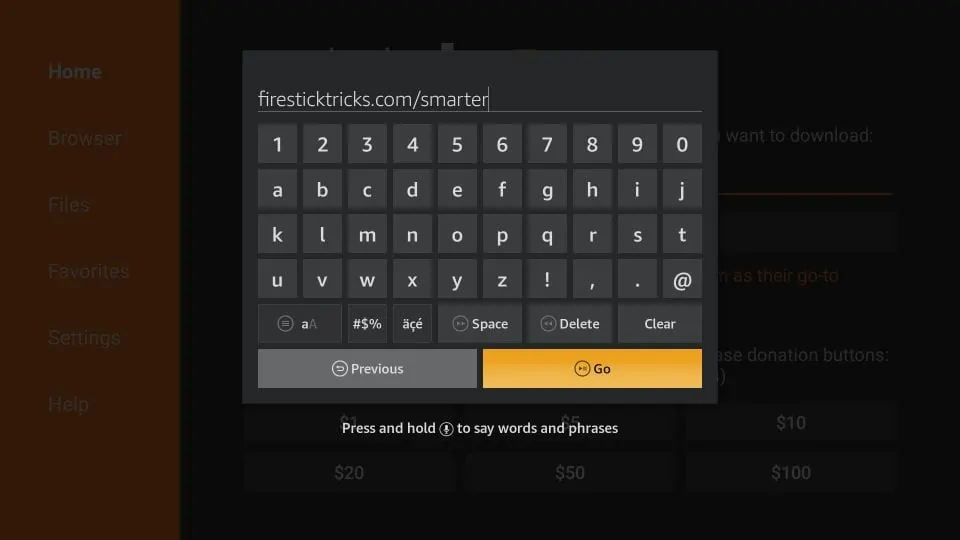
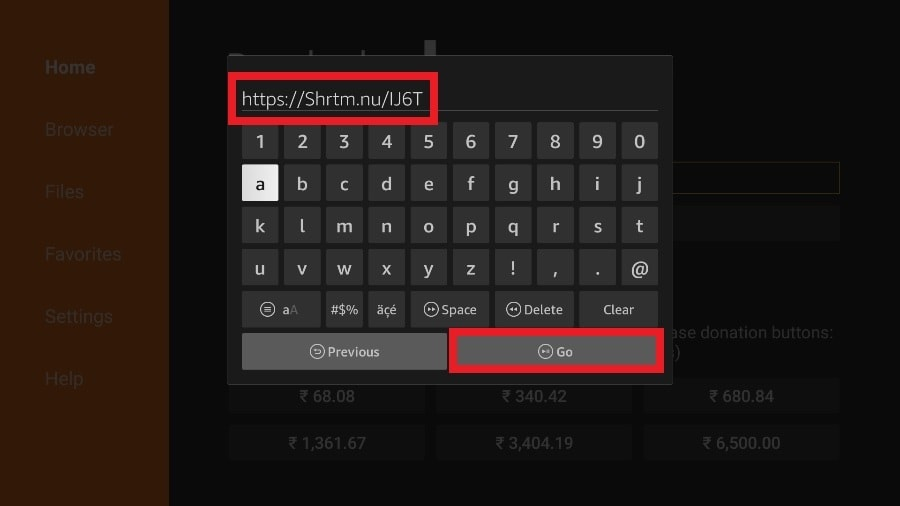
10.Gehen Sie voran und geben Sie den folgenden Pfad in dieses Fenster ein: https://www.iptvsmarters.com/smarters.apk
Klicken Sie auf “LOS”.
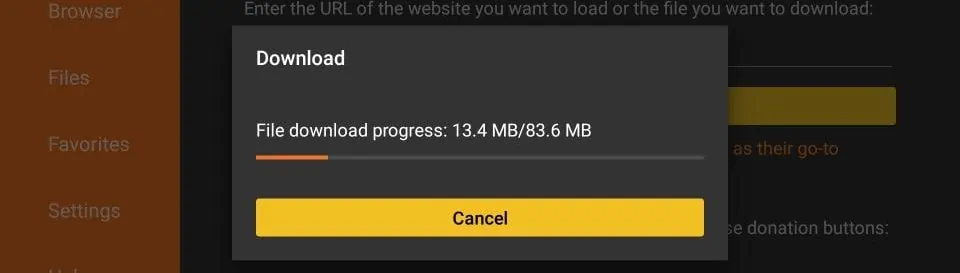
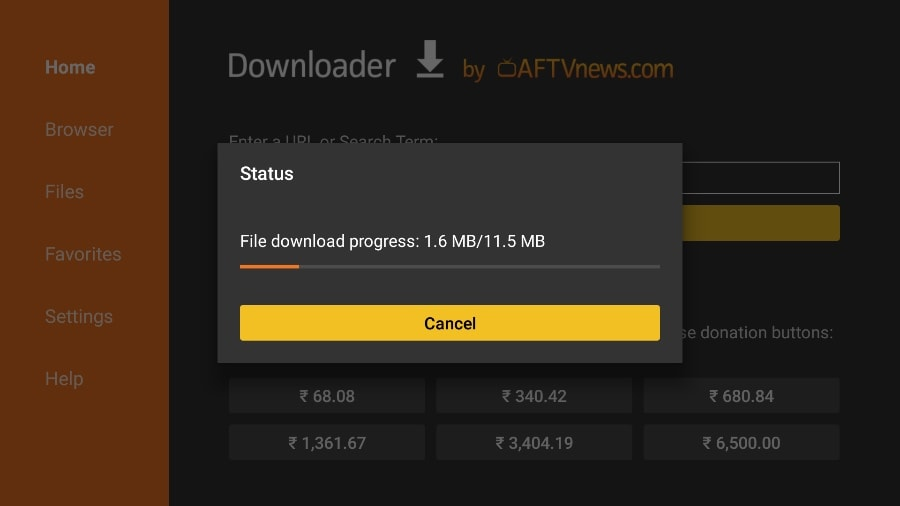
11. Geben Sie ihm eine Minute oder zwei, bis IPTV Smarter auf Ihr FireStick-Gerät heruntergeladen wurde.
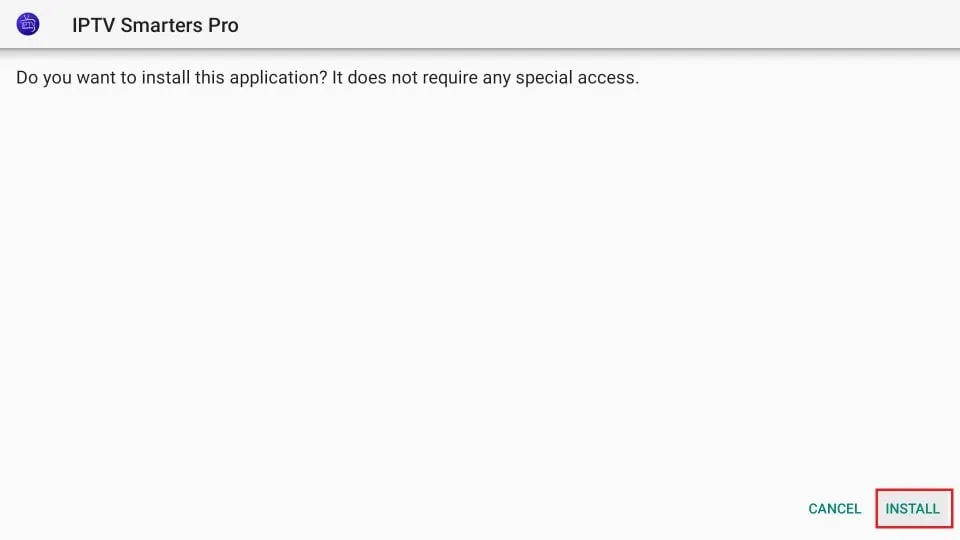
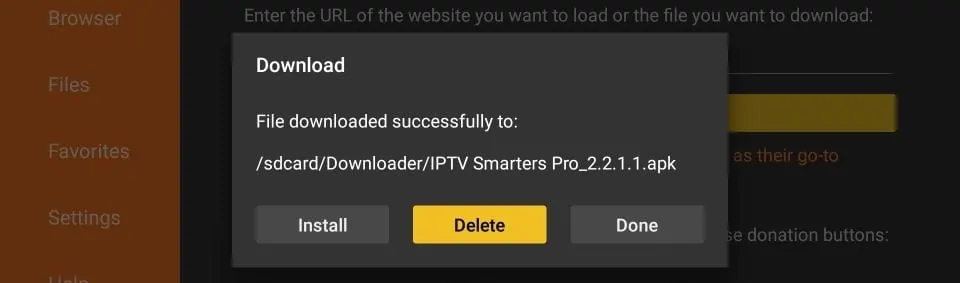
12.Wenn der Download abgeschlossen ist, wird die Downloader-App die APK-Datei ausführen, und die Installation wird beginnen.
Klicken Sie auf “Installieren“.
13. Warten Sie, bis die Installation abgeschlossen ist.
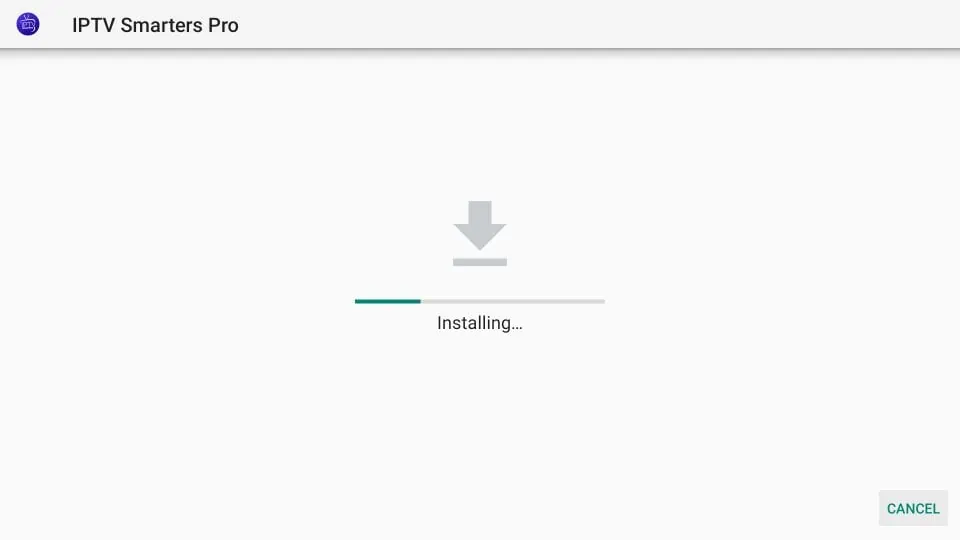
14.Die Installation ist abgeschlossen mit der Benachrichtigung “App installiert”.
Sie können jetzt auf ÖFFNEN klicken und mit IPTV Smarters beginnen.
Ich empfehle, zuerst auf “FERTIG” zu klicken, damit Sie die APK-Datei löschen und etwas Speicherplatz auf dem FireStick freigeben können.

15.Wenn Sie oben auf “FERTIG” geklickt haben, befinden Sie sich wieder in der Downloader-Benutzeroberfläche.
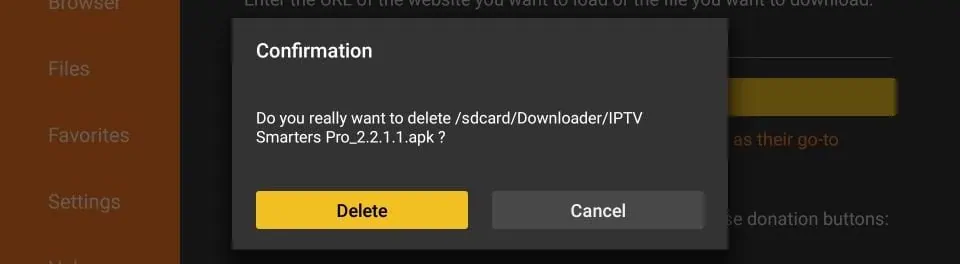
Klicken Sie auf “Löschen”.
16. Erneut auf “Löschen” klicken.
Großartig! Sie haben jetzt die IPTV Smarters App auf dem FireStick.
APPLE ( iPhone/iPad/Apple TV)
ANDROID ( Smartphone,Android Box)
PC/MAC (VLC Software)
STB Emulator
MAG250/254/256
ROKU Device
Wie man IPTV auf Roku mit einem einfachen Trick installiert
Dieses Tutorial bietet schrittweise Anweisungen zur Installation von IPTV auf Roku. Unter Verwendung eines Roku-Geräts müssen wir IPTV “sideloaden” auf das Roku-Gerät. Die folgenden Anweisungen erfordern die Verwendung eines Computers, um die IPTV-App-Datei herunterzuladen und sie zu Ihrem Roku-Streaming-Gerät hinzuzufügen.
Wenn Sie einen anderen IPTV-Player wie TiviMate verwenden, können Sie IPTV auf Roku auch durch Casting auf Ihr Roku-Gerät anschauen. IPTV Smarters ist einer der besten IPTV-Player, kompatibel mit Hunderten von IPTV-Diensten, die eine Server-URL verwenden.
Wie auch immer, kommen wir dazu, wie man IPTV auf Roku installiert. Ich habe die Anweisungen in vier Teile unterteilt, um sie leichter verständlich zu machen:
- Teil 1: Aktivieren der Entwickleroptionen auf Roku
- Teil 2: Hinzufügen des IPTV Smarters Kanals
- Teil 3: Herunterladen des IPTV Smarters-Pakets auf deinen Computer
- Teil 4: Installation von IPTV Smarters auf Roku
Keine Sorge, der Prozess ist einfacher als es klingt. Lass uns beginnen.
Entwickleroptionen auf Roku aktivieren
1. Starten Sie Ihren Roku, indem Sie auf den HDMI-Eingang auf Ihrem Fernseher wechseln.
2. Nehmen Sie Ihre Roku-Fernbedienung und drücken Sie die folgenden Tasten in dieser Reihenfolge: Home-Taste x3, Pfeil nach oben x2, Pfeil nach rechts x1, Pfeil nach links x1, Pfeil nach rechts x1, Pfeil nach links x1, Pfeil nach rechts x1.
3. Wenn alles richtig gemacht wurde, erscheint das Entwickleroptionen-Menü auf Ihrem Roku-Fernsehbildschirm.

Aktivieren Sie den Roku-Entwicklermodus, um Anwendungen über einen Webbrowser zu installieren. 4. Schreiben Sie die auf dem Bildschirm angezeigte IP-Adresse auf..
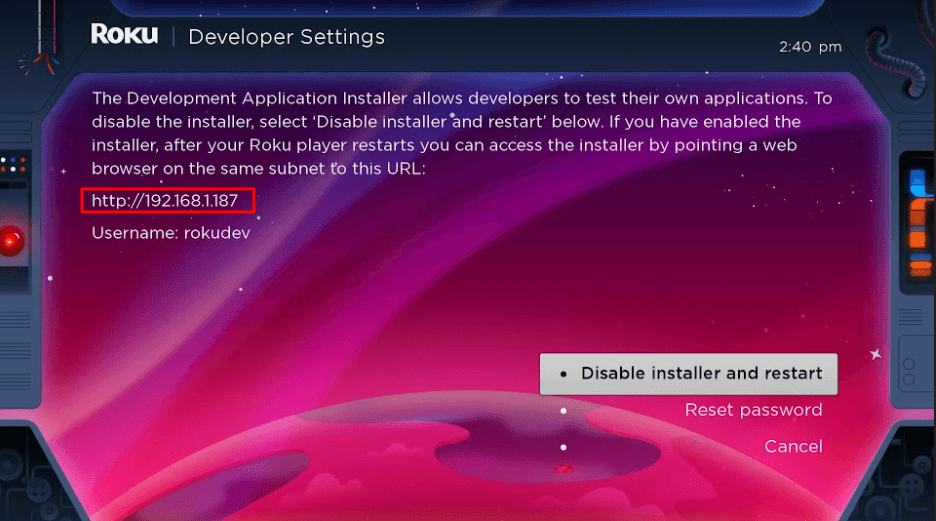
Nutzen Sie die angegebene URL in einem Webbrowser, um auf den Roku-Entwickler-Installer zuzugreifen. 5. Wählen Sie ‘Installer aktivieren und neu starten‘ aus (bei mir steht ‘Deaktivieren’, weil ich das bereits gemacht habe).
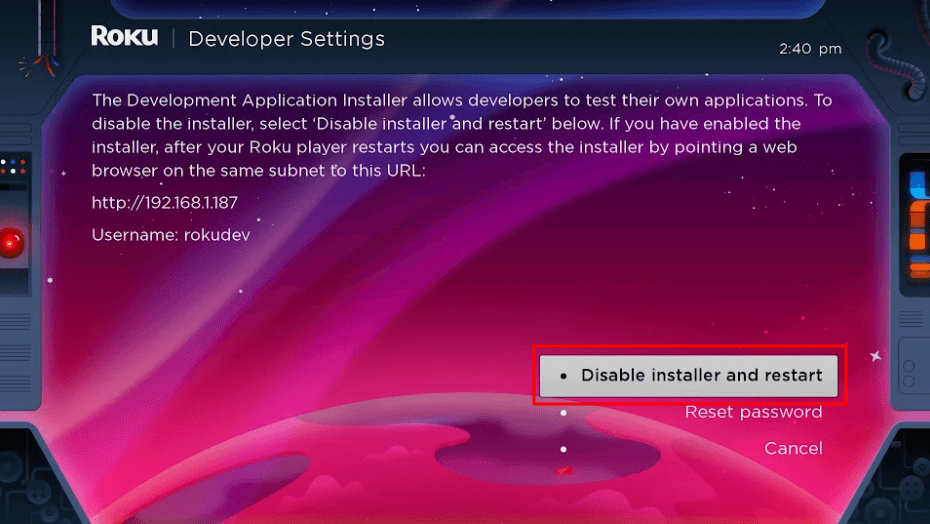
Wählen Sie ‘Installer deaktivieren und neu starten’, um den Roku-Entwicklermodus zu beenden und das Gerät neu zu starten. 6. Scrollen Sie durch die Lizenzvereinbarung für Entwicklerwerkzeuge und wählen Sie ‘Ich stimme zu‘.
7. Erstellen Sie ein Webserver-Passwort mithilfe der Tastatur, die angezeigt wird. Sie benötigen Ihr Webserver-Passwort für einen späteren Schritt.
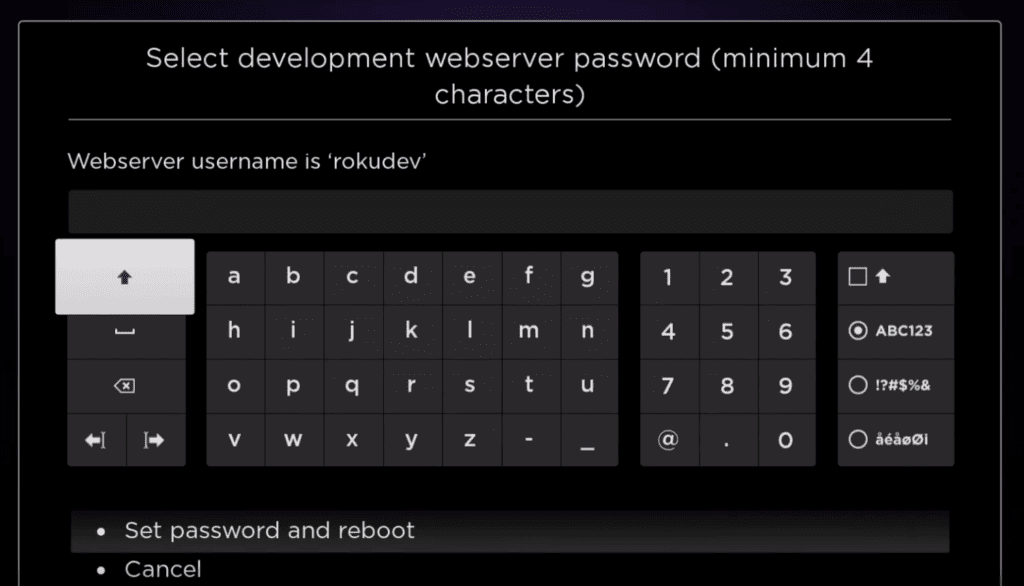
Geben Sie ein sicheres Passwort ein, um den Entwicklermodus auf Roku zu aktivieren und auf den Webserver zuzugreifen. 8. Wählen Sie Passwort festlegen und neu starten.
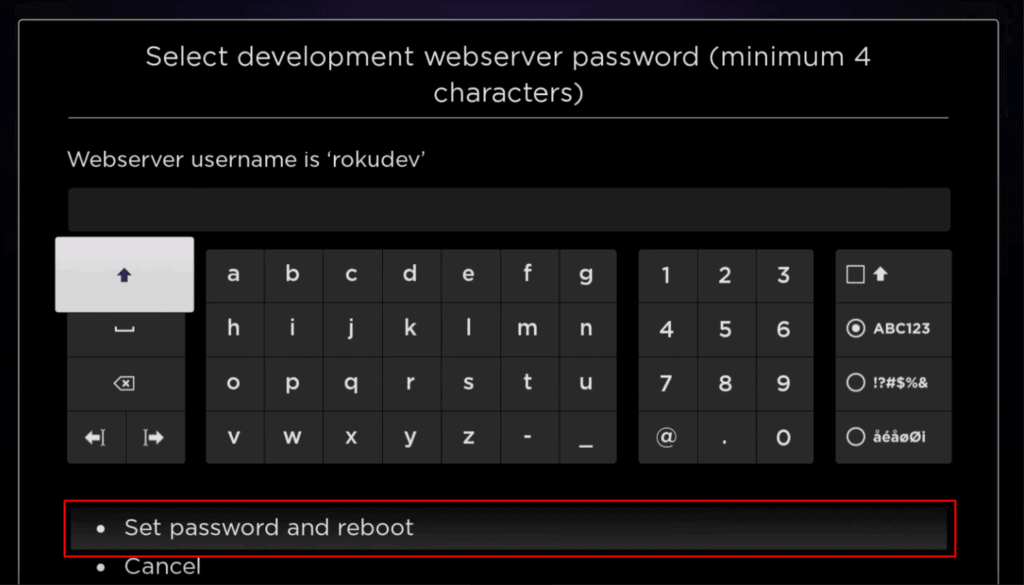
Geben Sie ein Passwort ein und wählen Sie ‘Passwort festlegen und neu starten’, um den Entwicklermodus auf Roku zu aktivieren. Teil 2: IPTV Smarters Kanal hinzufügen
1. Gehen Sie zu Ihrem Computer und öffnen Sie mit einem beliebigen Browser my.roku.com.
2. Geben Sie Ihren Benutzernamen und Ihr Passwort für Ihr Roku-Konto ein und klicken Sie auf ‘Absenden’.
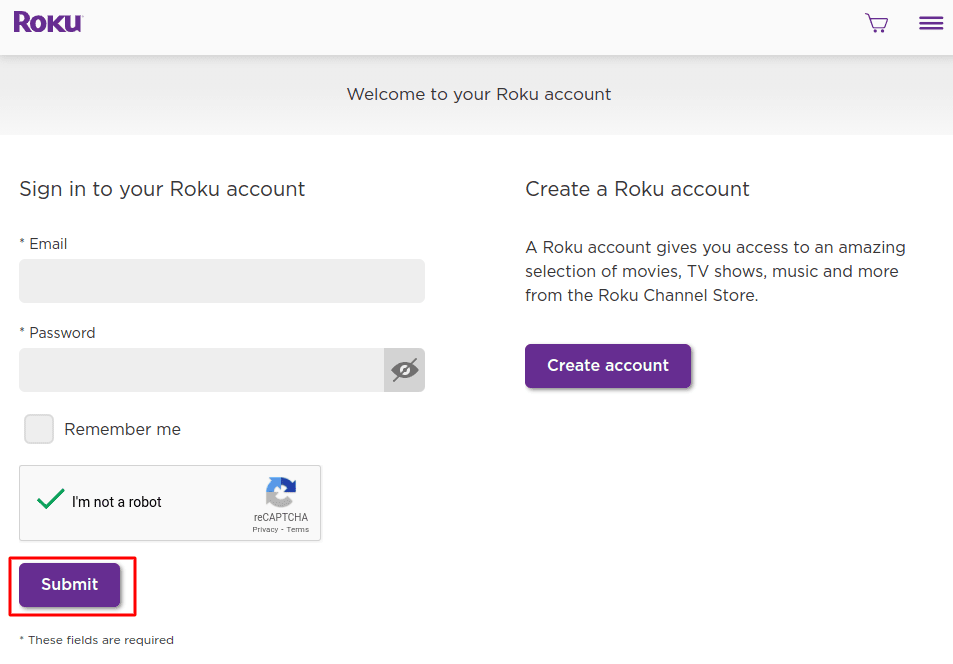
Geben Sie Ihre Roku-Konto-Daten ein oder erstellen Sie ein neues Konto, um auf Streaming-Dienste zuzugreifen. 3. Nachdem Sie sich angemeldet haben, wählen Sie ‘Kanal mit einem Code hinzufügen’ unter ‘Konto verwalten’ aus..
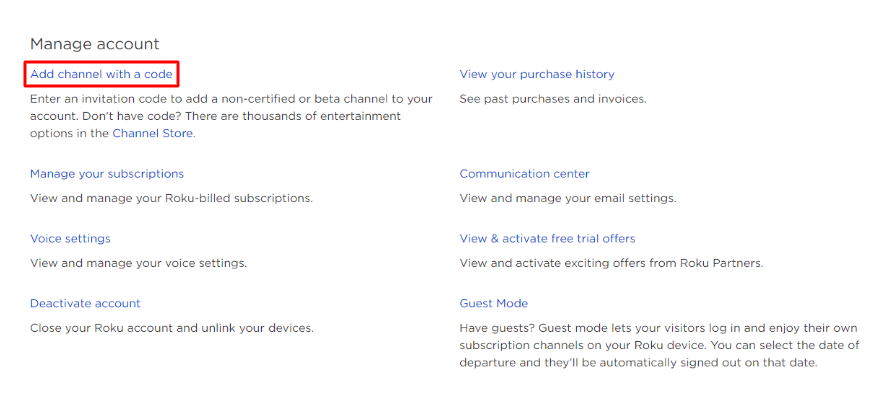
Geben Sie einen Code ein, um einen nicht zertifizierten oder Beta-Kanal zu Ihrem Roku-Konto hinzuzufügen. 4. Geben Sie iptvsmarters in das Feld ein. Stellen Sie sicher, dass Sie es genau so eingegeben haben, wie angezeigt.
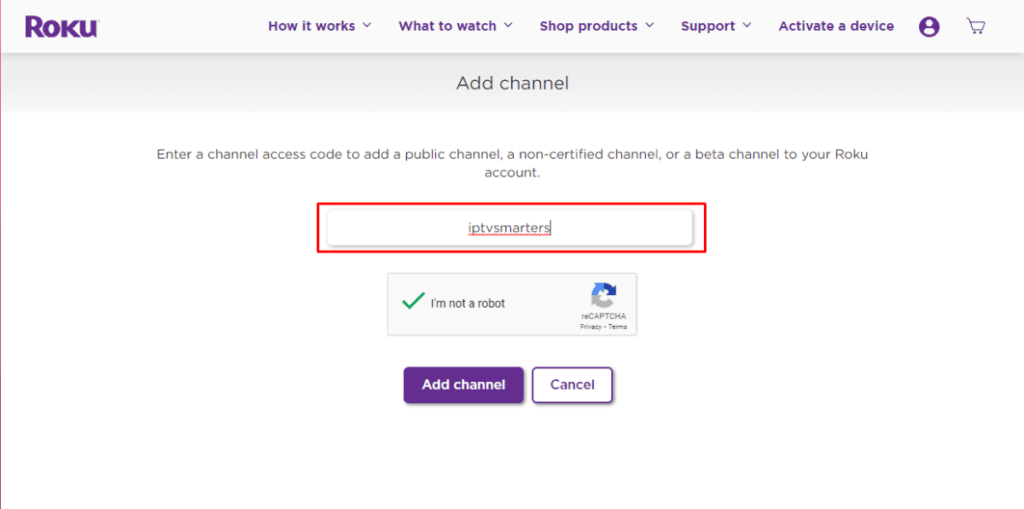
Geben Sie den IPTV Smarters-Kanalcode ein, um ihn zu Ihrem Roku-Konto hinzuzufügen. 5. Wählen Sie ‘Kanal hinzufügen’, um ihn zu Ihrem Roku hinzuzufügen.

Geben Sie den IPTV Smarters-Kanalcode ein und klicken Sie auf ‘Kanal hinzufügen’, um die Installation auf Roku zu bestätigen. 6. Klicken Sie auf OK auf der Warnmeldung, die erscheint.
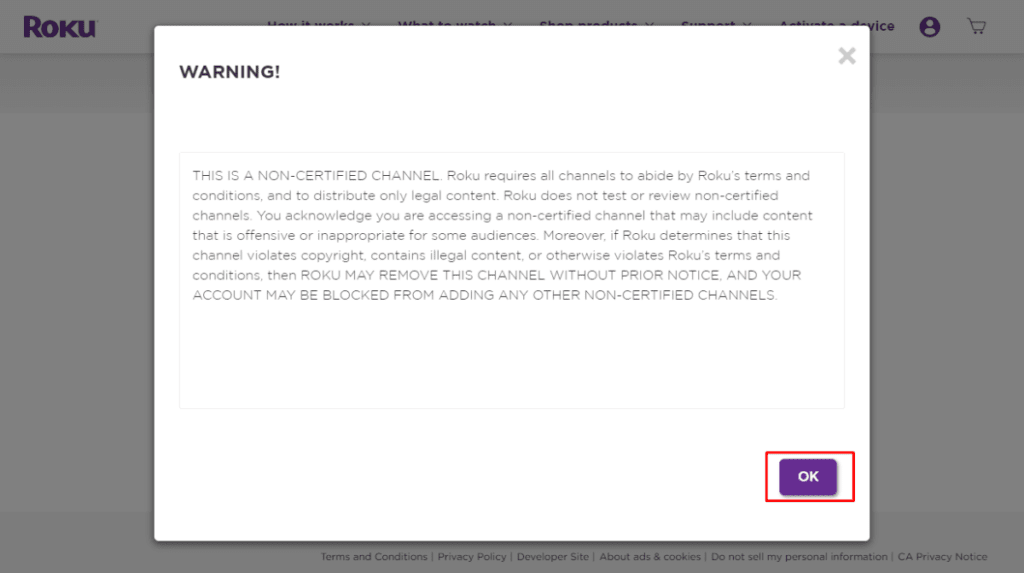
Beim Hinzufügen eines nicht zertifizierten Kanals auf Roku erscheint diese Warnung. Klicken Sie auf ‘OK’, um fortzufahren. 7. Wählen Sie Ja, Kanal hinzufügen in dem darauf folgenden Popup aus.
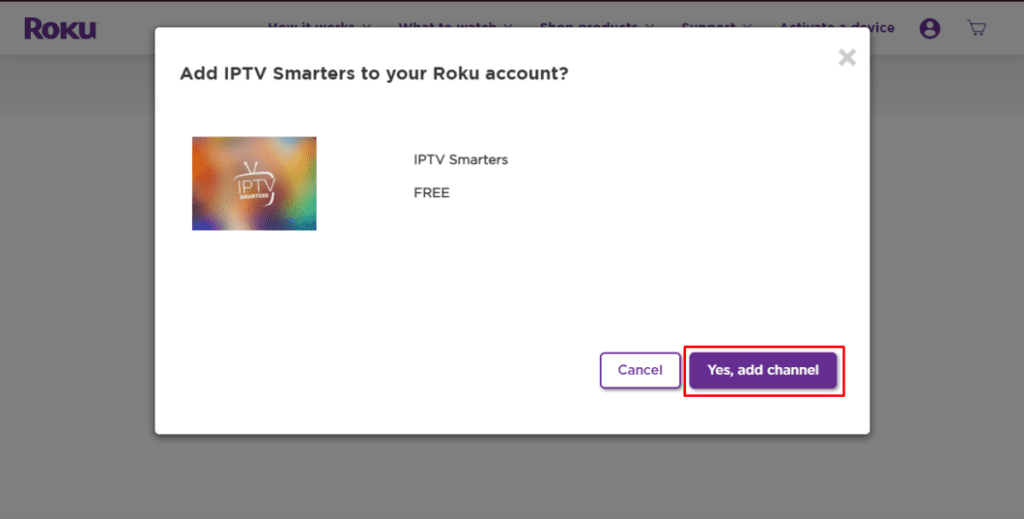
Klicken Sie auf ‘Ja, Kanal hinzufügen’, um IPTV Smarters kostenlos zu Ihrem Roku-Konto hinzuzufügen. Teil 3: Laden Sie das IPTV Smarters-Paket auf Ihren Computer herunter.
Jetzt ist es an der Zeit, die IPTV Smarters-Datei auf Ihren Computer herunterzuladen..
1. Gehen Sie auf Ihrem Computer zu diesem Link, und der Download sollte automatisch starten: https://www.whmcssmarters.com/clients/dl.php?type=d&id=108
Note: FireStickTricks.com hostet oder verteilt diese APK nicht. Der Link führt zur Website, auf der sie gehostet ist.
2. Speichern Sie das IPTV Smarters-Paket an einem zugänglichen Ort auf Ihrem Computer (Sie müssen gleich an diesen Ort navigieren). Ich werde es auf meinem Desktop speichern.
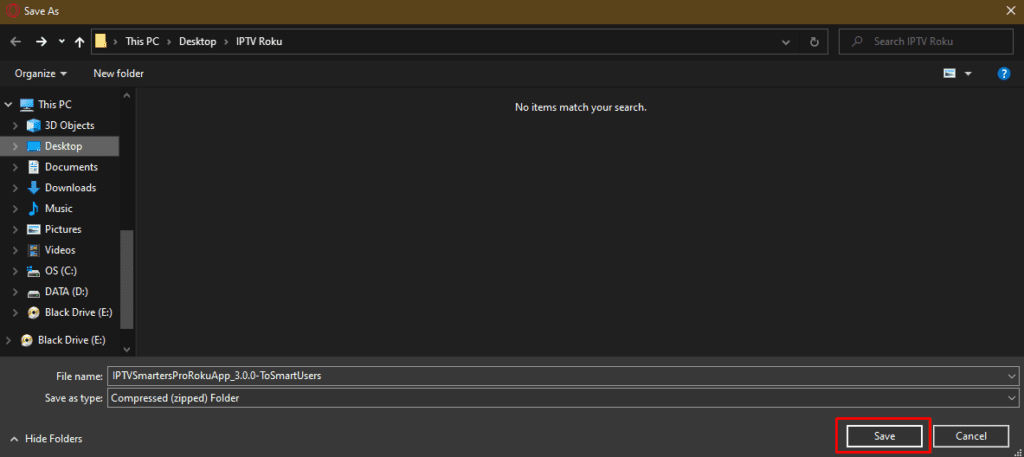
Speichern der IPTV Smarters Pro Roku App als komprimierter Ordner vor der Installation. Teil 4: Installieren von IPTV Smarters auf Roku
1. Öffnen Sie auf Ihrem Computer einen beliebigen Browser. Geben Sie in die Adressleiste die IP-Adresse Ihres Roku ein, die Sie zuvor notiert haben.
2. Ein Anmeldefenster wird erscheinen. Geben Sie ‘rokudev’ als Benutzernamen ein. Geben Sie als Passwort das Webserver-Passwort ein, das Sie zuvor erstellt haben. Klicken Sie abschließend auf ‘Anmelden’.
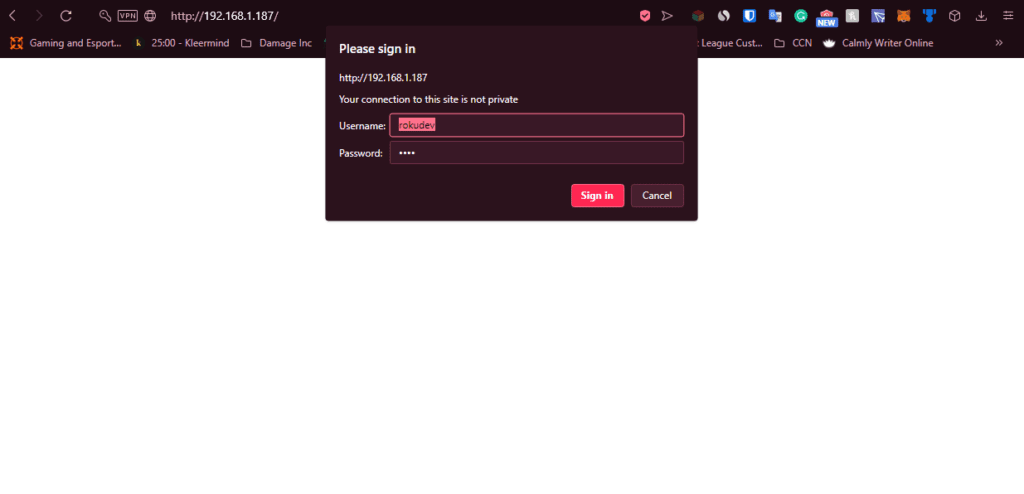
Geben Sie ‘rokudev’ als Benutzernamen und das zugewiesene Passwort ein, um den Roku-Entwicklermodus zu betreten. 3. Klicken Sie auf ‘Hochladen’ auf der nächsten Seite.

Klicken Sie auf ‘Upload’, um die Datei auszuwählen, bevor Sie eine Roku-Entwickleranwendung installieren. 4. Gehen Sie zum Speicherort, an dem Sie das IPTV Smarters-Paket heruntergeladen haben (bei mir war es mein Desktop). Wählen Sie den heruntergeladenen Ordner aus und klicken Sie auf ‘Öffnen’.

Wählen Sie die IPTV Smarters Pro ZIP-Datei aus und klicken Sie auf ‘Öffnen’, um mit der Installation auf Roku fortzufahren. 5. Klicken Sie auf ‘Installieren’, sobald die Datei hochgeladen wurde.

Klicken Sie auf ‘Installieren’, um die Installation von IPTV Smarters Pro auf Roku abzuschließen. 6. Wenn Sie diesen Bildschirm sehen, haben Sie es richtig gemacht!
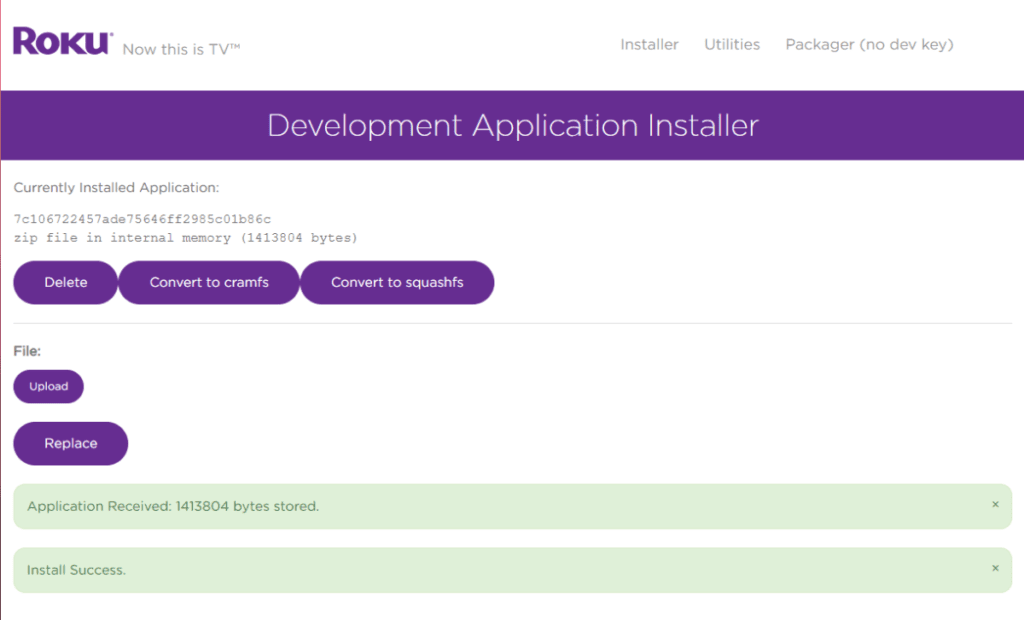
Die IPTV Smarters App wurde erfolgreich über den Entwicklermodus auf Roku installiert. 7. Kehren Sie zu Ihrem Roku-Gerät zurück, und IPTV Smarters wird auf dem Fernsehbildschirm angezeigt sein.
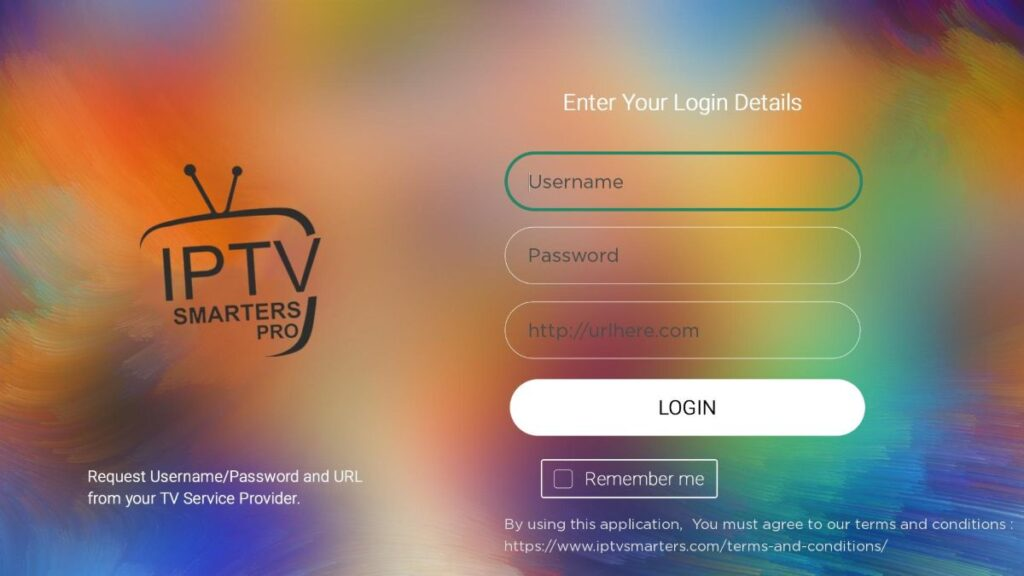
Geben Sie Ihren Benutzernamen, Ihr Passwort und die Server-URL ein, um sich bei IPTV Smarters Pro anzumelden. 8. Melden Sie sich einfach mit Ihren IPTV Smarters Anmeldedaten an und schon sind Sie drin!
Schritte zum Ansehen von IPTV auf Roku über Bildschirmspiegelung
Um IPTV auf Ihrem mit Roku verbundenen Fernseher über Bildschirmspiegelung zu streamen, müssen Sie IPTV Smarters oder Smart IPTV (einen anderen IPTV-Player) auf Ihrem Smartphone installieren. Sobald Sie einen dieser beiden Player haben, können Sie die Cast- oder Spiegelungsoption auf Ihrem Gerät verwenden.
Mit der Cast-/Spiegelungsoption können Sie von jedem Gerät im selben WLAN-Netzwerk, das die IPTV-Player-App verwendet, auf den Inhalt auf Ihrem Roku-Fernseher zugreifen.
SONY TV
FIRESTICK : Wie installiere ich TiviMate
Bitte gehen Sie die untenstehenden drei Teile durch, um TiviMate auf dem FireStick zu installieren.
Teil 1: Laden Sie “Downloader” auf dem FireStick
1. Öffnen Sie den Startbildschirm des FireStick.
2. Gehen Sie zum Menü “Finden”.
3. Wählen Sie oben “Suchen” aus.

4. Es wird eine virtuelle Tastatur auf Ihrem FireStick geöffnet.
5. Beginnen Sie mit der Eingabe von “Downloader”. Wählen Sie “Downloader” aus, wenn es unter den Vorschlägen unterhalb der Tastatur angezeigt wird.
6. Wählen Sie die App “Downloader” aus, die Sie anhand ihres orangefarbenen Hintergrunds erkennen können. Wählen Sie dann auf dem folgenden Bildschirm die Schaltfläche “Herunterladen” oder “Laden” aus.
Die Installation der Downloader-App auf Ihrem FireStick dauert einen Moment. Bevor Sie die Downloader-App öffnen, um die TiviMate APK zu installieren, müssen Sie Änderungen im FireStick-Einstellungsmenü vornehmen. Andernfalls erhalten Sie während der Installation Fehlermeldungen.
Teil 2: Ändern Sie die FireStick-Einstellungen
1. Drücken Sie die “Home-Taste” auf Ihrer FireStick-Fernbedienung.
2. Gehen Sie zum “Einstellungen-Zahnrad” ganz rechts.
3. Scrollen Sie nach unten und wählen Sie “Mein Fire TV” aus.
4. Wählen Sie “Entwickleroptionen”.
5. Suchen Sie nach “Apps aus unbekannten Quellen”. Standardmäßig ist es deaktiviert. Wählen Sie es aus, um es einzuschalten.
Jetzt können Sie ohne Probleme jede App-Installationsdatei (APK) bequem auf dem FireStick sideloaden. Befolgen Sie die unten stehenden Schritte, um die TiviMate APK mithilfe der Downloader-App auf dem FireStick zu installieren.
Teil 3: Verwenden Sie Downloader, um TiviMate auf dem FireStick zu installieren
1. Gehen Sie im FireStick-Startmenü zum Menü “Apps”.
2. Öffnen Sie die Downloader-App und wählen Sie auf dem Startbildschirm das Feld “URL eingeben” aus.
3. Es wird eine virtuelle Tastatur geöffnet. Geben Sie “https://www.firesticktricks.com/tivi” ein und drücken Sie unten auf “Los”.
4. Downloader wird die neueste TiviMate APK auf Ihrem FireStick installieren. Sie hat eine Größe von etwa 11 MB.
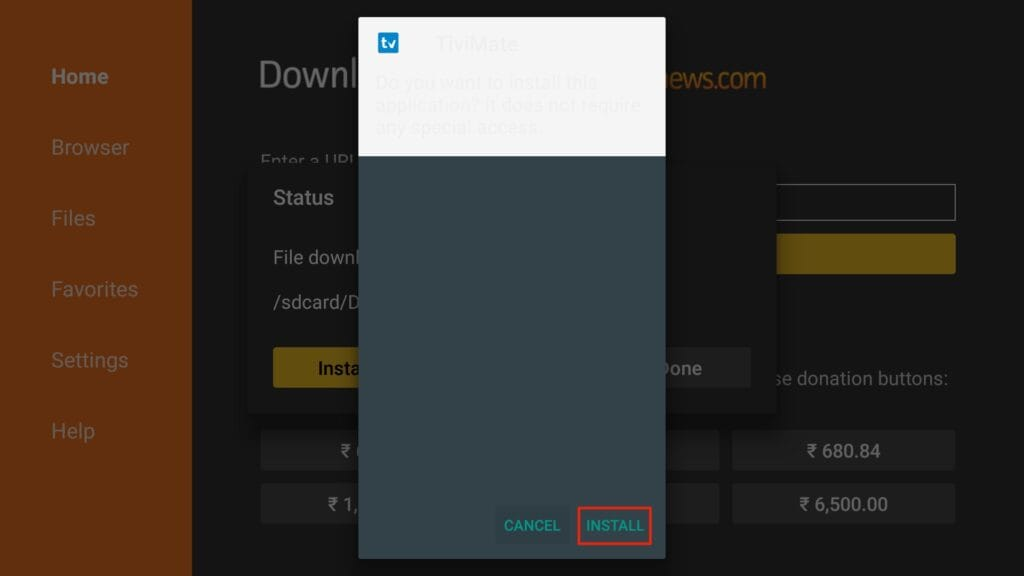
5. Klicken Sie auf “Installieren”, wenn Sie dazu aufgefordert werden.
6. Nach der Installation können Sie die APK-Datei von Ihrem Gerät löschen.
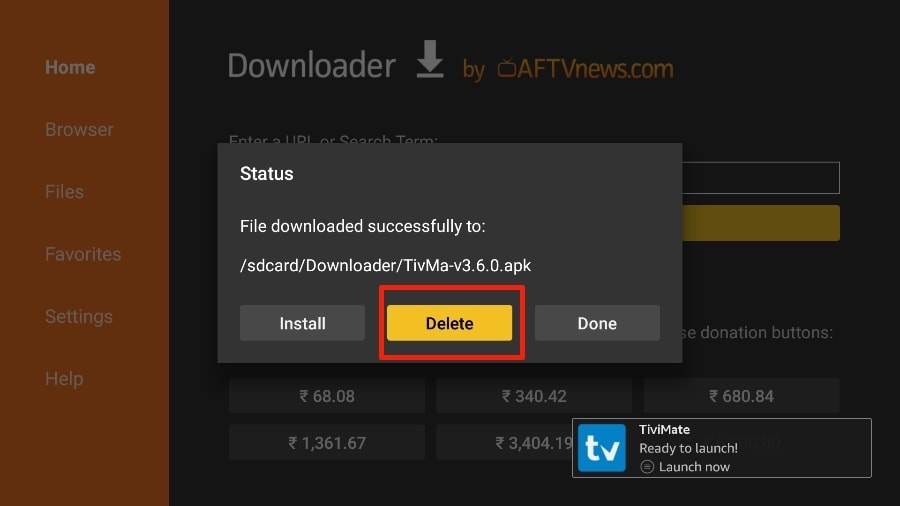
Ich schlage vor, dass unsere Leser die APK-Datei auf dem FireStick löschen, da sie keinen Zweck mehr erfüllt. Wir haben sie bereits verwendet, um TiviMate zu installieren. Im Allgemeinen empfehle ich Ihnen, Ihren FireStick frei von unnötigen Dateien und Medien zu halten. Wenn der Speicherplatz knapp wird, kann dies zu einer langsamen Leistung des Geräts führen.
Das ist alles! Sie haben die TiviMate APK erfolgreich auf Ihrem FireStick installiert. Jetzt können Sie Hunderte von Live-Kanälen, Filmen und TV-Serien auf dem FireStick genießen. Bevor wir die App besprechen, machen wir eine schnelle Anpassung für unsere Bequemlichkeit.
TiviMate IPTV Player ist eine süchtig machende App, die Sie wahrscheinlich häufig nutzen werden. Ich empfehle Ihnen, die App direkt auf dem Startbildschirm des FireStick zu platzieren, um einen einfachen Zugriff zu ermöglichen. Gehen Sie die folgenden Schritte durch, um dies zu tun.
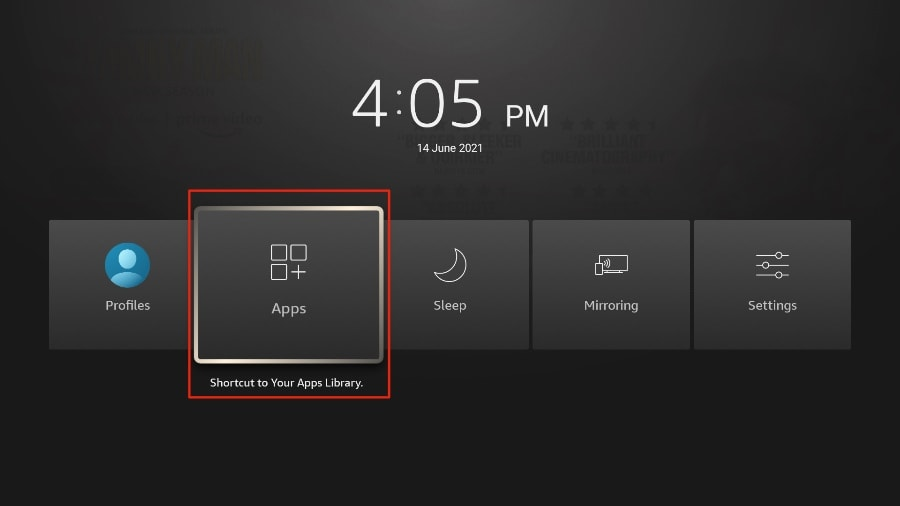
1. Drücken und halten Sie die “Home-Taste” auf Ihrer FireStick-Fernbedienung gedrückt.
2. Wählen Sie auf dem folgenden Bildschirm “Apps” aus.
3. Scrollen Sie zu “TiviMate IPTV Player”, wählen Sie es jedoch nicht aus. Drücken Sie stattdessen die “Optionen-Taste” auf Ihrer FireStick-Fernbedienung.
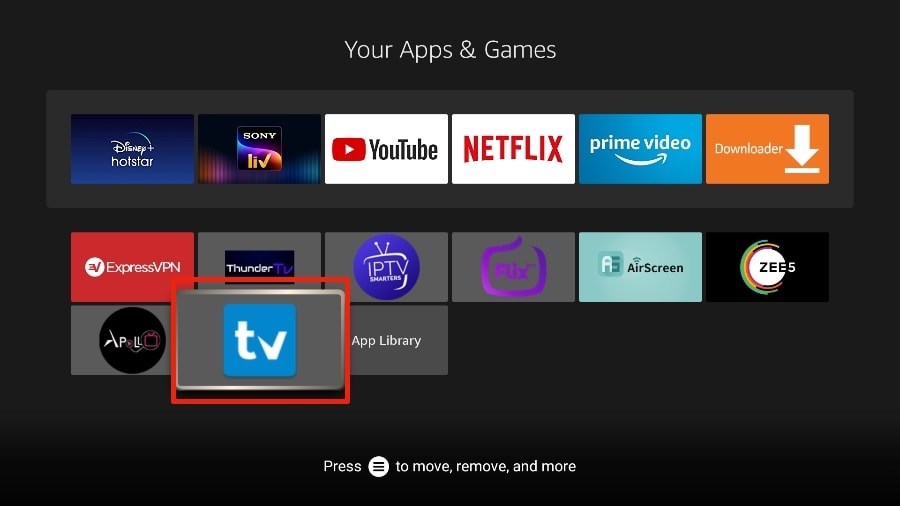
4. Auf der rechten Seite finden Sie die Option “Verschieben”. Wählen Sie sie aus.

5. Verschieben Sie TiviMate in die oberste Reihe und drücken Sie dann die “Auswahltaste” auf Ihrer Fernbedienung, um den neuen Speicherort zu bestätigen.

6. Jetzt können Sie bequem auf den TiviMate Player von Ihrem FireStick-Startbildschirm aus zugreifen. Es ist nicht mehr notwendig, jedes Mal durch ein Menü zu navigieren.
WIE RICHTE ICH TIVIMATE EIN
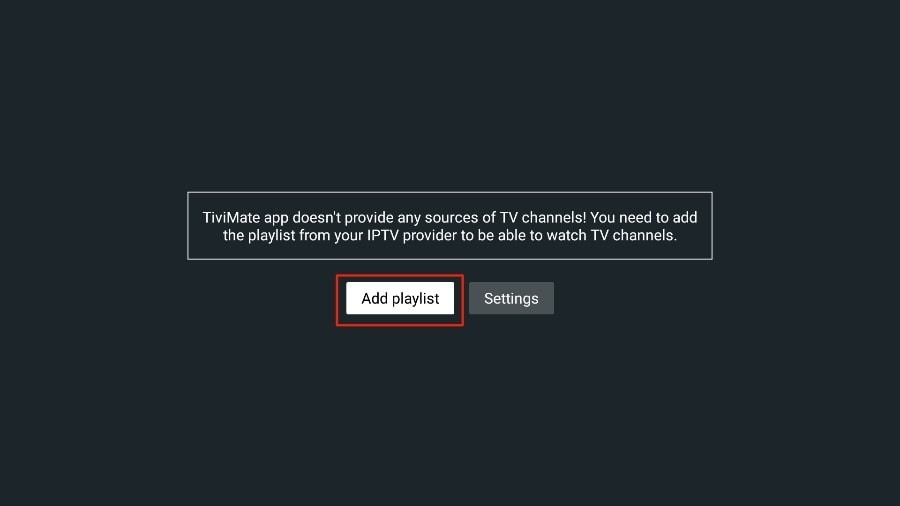
1. Öffnen Sie die TiviMate-App.
2. Wählen Sie “Playlist hinzufügen” aus.
3. TiviMate wird Sie bitten, eine Wiedergabeliste mit Hilfe eines M3U-Links, Xtream-Codes oder eines Stalker-Portals hinzuzufügen. Wählen Sie “M3U-Wiedergabeliste” aus.
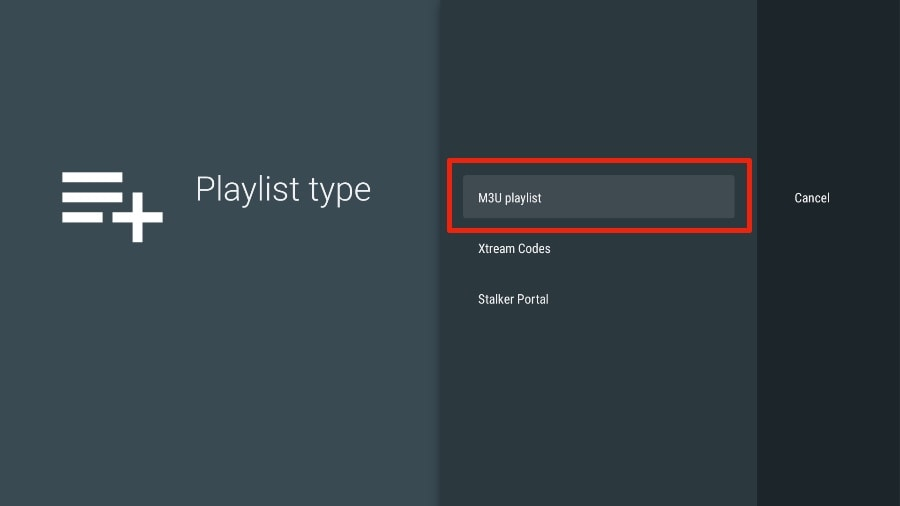
In diesem Artikel werden wir einen M3U-Link verwenden, um einen IPTV-Dienst in der TiviMate-App abzuspielen. Wenn Sie sich für unseren IPTV-Service anmelden, erhalten Sie eine E-Mail mit den entsprechenden Login-Informationen und einem M3U-Link. Wenn Sie keinen M3U-Link erhalten, kontaktieren Sie bitte unseren Kundensupport.
4. TiviMate wird nach Ihrem M3U-Link fragen. Geben Sie Ihren M3U-Link ein und drücken Sie dann auf “Weiter”.

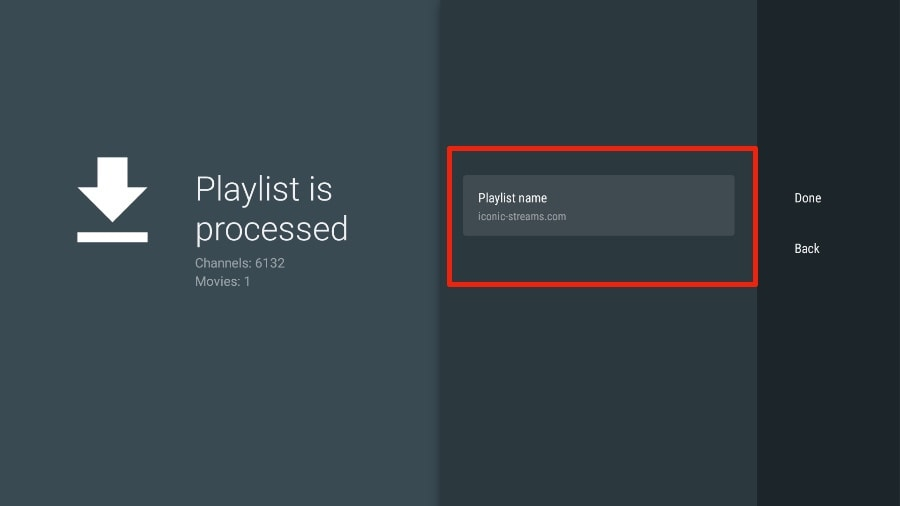
5. TiviMate wird den IPTV-Dienst laden und einen Einblick in die Anzahl der verfügbaren Kanäle und Filme im IPTV-Paket bieten.
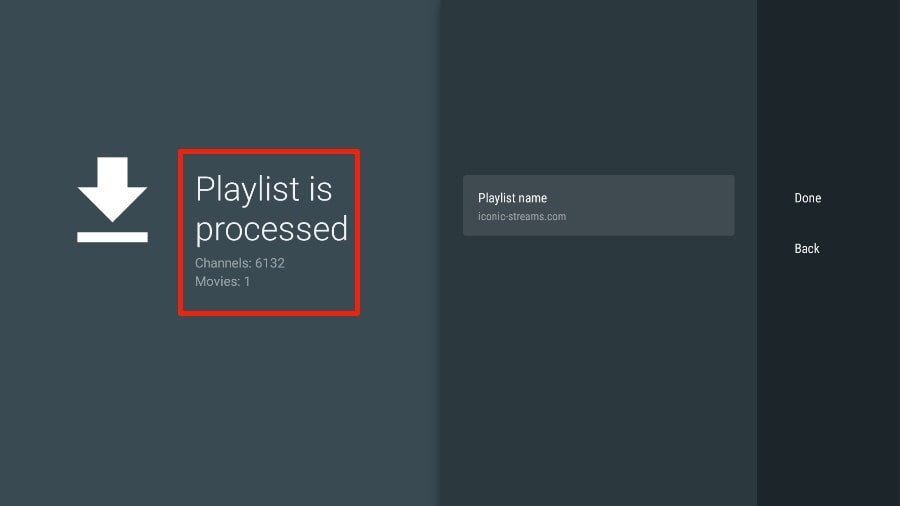
6. Geben Sie einen Namen für die Wiedergabeliste ein.
7. Wenn die Wiedergabeliste fertig verarbeitet ist, wählen Sie “Fertig” aus.
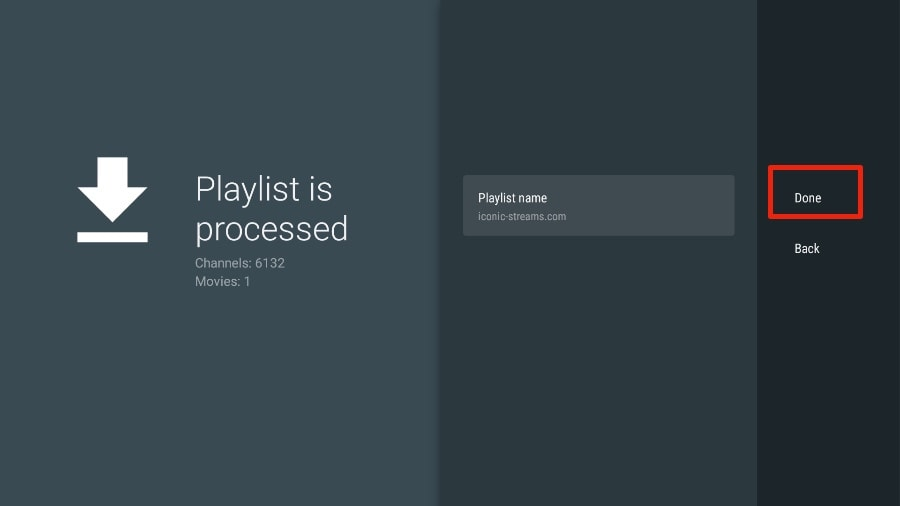
Nach ein bis zwei Minuten sehen Sie den Inhalt des IPTV-Dienstes in der TiviMate-App erscheinen.
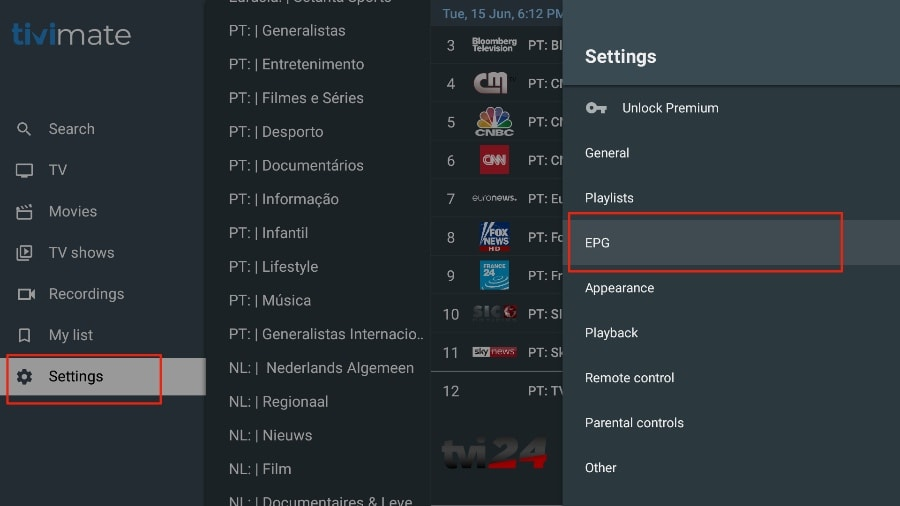
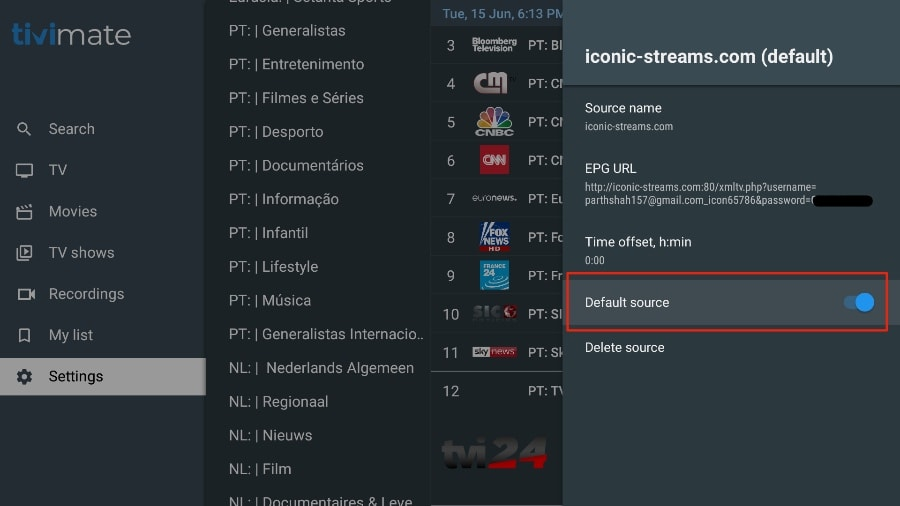
Unser IPTV-Dienst enthält einen dedizierten EPG (elektronischer Programmführer), wie unten dargestellt.

Wenn Sie im TiviMate-App keinen EPG sehen, sollten Sie in den Einstellungen der App prüfen, ob er aktiviert ist.
Wie bereits erwähnt, sind die wichtigsten Funktionen von TiviMate kostenpflichtig. Sie müssen für die Premium-Version bezahlen, um TiviMate in vollem Umfang nutzen zu können.
Wenn Sie versuchen, auf eine Premium-Funktion zuzugreifen, ohne über ein Premium-Konto zu verfügen, wird TiviMate Sie auffordern, auf die Premium-Version zu aktualisieren. Wenn Sie zum Beispiel versuchen, einen Kanal zu Ihrer Favoritenliste hinzuzufügen, wird TiviMate Sie auffordern, die App zu aktualisieren. Wenn Sie weiterhin die kostenlose Version verwenden möchten, können Sie auf “Abbrechen” klicken und die kostenlose TiviMate-App auf dem FireStick weiterhin nutzen.
Um die Premium-Version zu erwerben, müssen Sie die TiviMate Companion-App aus dem Google Play Store verwenden.